
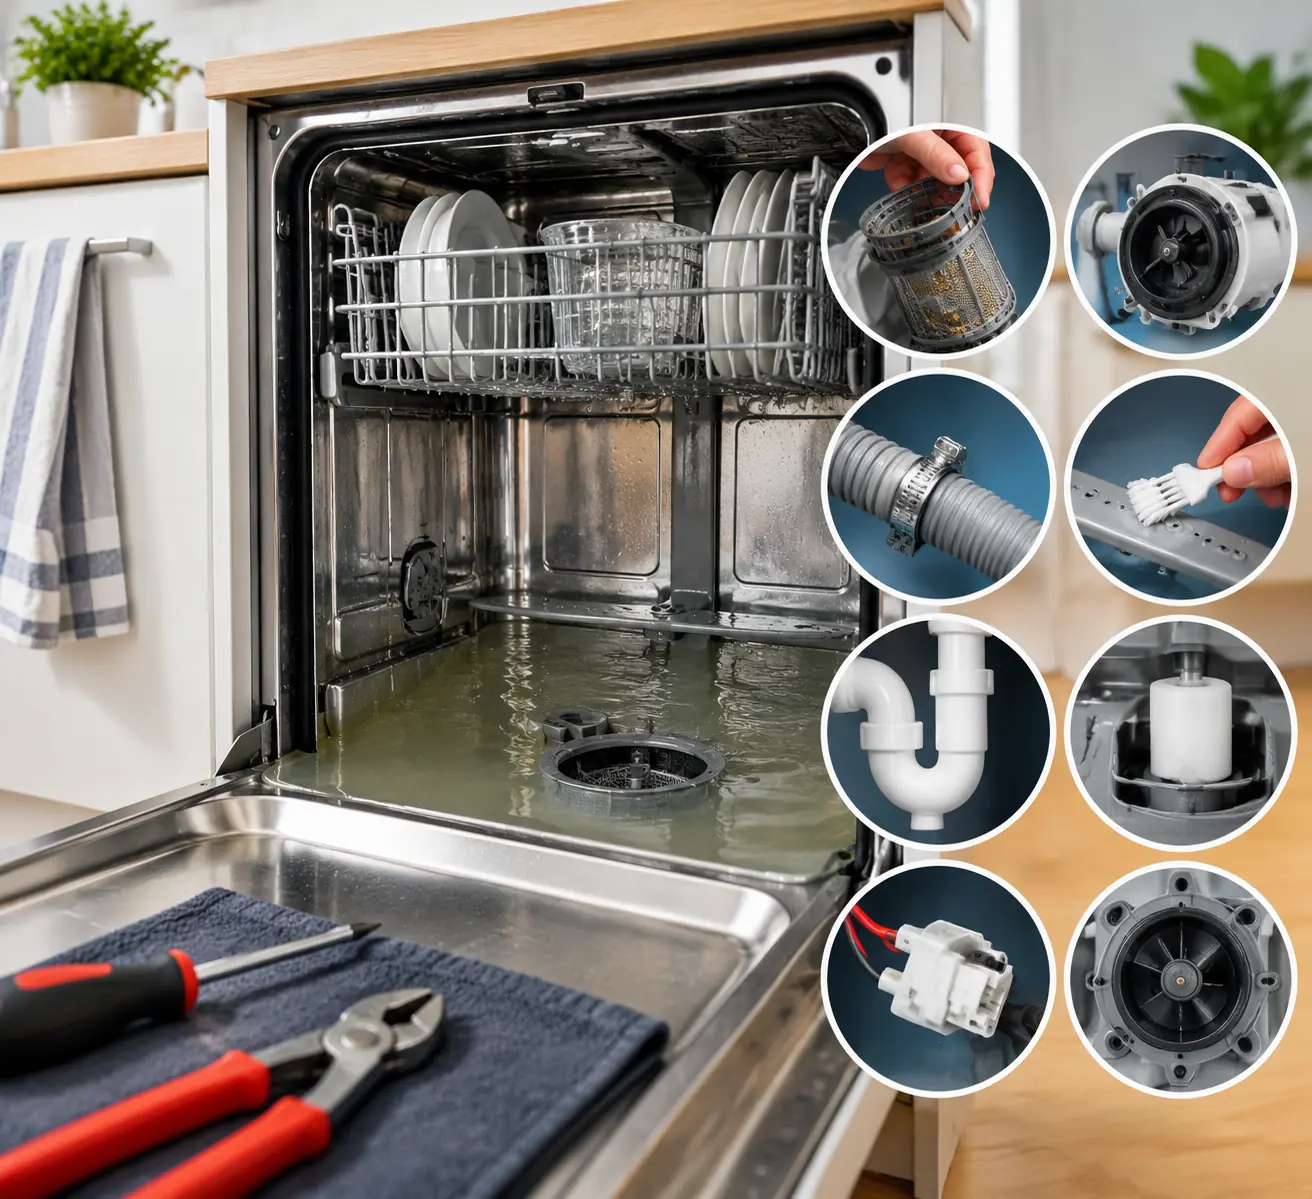
A dishwasher not draining properly is a frustrating issue that often stems from hidden clogs or mechanical failures. Left unchecked, standing water can cause mold growth and expensive structural damage to your cabinetry. Identifying the root cause requires professional inspection of internal components like the pump and filters. DIY fixes may not resolve the issue, so contact us today to prevent further damage and restore your appliance’s performance.
Understanding the Mechanics Behind a Dishwasher Not Draining Properly
When the cycle ends and the door reveals a pool of stagnant water, the issue often stems from a complex interplay of mechanical failures rather than a simple clog. Modern appliances rely on precise sensors and pumps to manage water flow. When any link in this chain breaks, drainage halts. The frustration of finding dirty water lingering at the bottom of the tub is common, but diagnosing the root cause requires a deeper look at how the machine operates internally. The primary driver of drainage is the drain pump, which must generate enough pressure to push wastewater out against gravity. If the pump motor fails or its capacitor dies, the impeller will not spin with sufficient force. This results in a humming noise without actual water movement. Such mechanical fatigue is frequent in older units and requires professional assessment to prevent further damage to the internal wiring. Internal sensors play a critical role in this process. These devices monitor water levels and detect leaks. If a sensor becomes stuck or malfunctions, it may confuse the control board, preventing the drain cycle from initiating or terminating prematurely. This is particularly true in certain models where the float switch gets trapped under debris. Incorrect leveling can also exacerbate this issue, as water may not reach the sensor at the correct height. The high loop installation is another vital mechanical component. This loop prevents wastewater from the sink or disposal from flowing back into the dishwasher. If the loop is loose or installed too low, siphoning can occur. This backflow not only fails to drain properly but can introduce fresh contaminants into the clean machine. Understanding these intricate connections is the first step toward resolution. Attempting to fix these complex internal failures without the right tools often leads to more significant damage. Water leakage can damage cabinets and flooring. The electrical components inside the machine pose serious safety risks if handled incorrectly. Therefore, identifying the specific mechanical fault is crucial before any repairs begin.
Identifying the Root Cause
- Check for unusual noises during the drain cycle
- Inspect the pump motor for signs of wear
- Verify sensor functionality and placement
- Examine the high loop for proper installation
Why Professional Diagnosis Matters
Many homeowners try to force a drain cycle, which can strain the motor further. Only a trained technician can accurately diagnose whether the issue lies with the pump, the control board, or the installation. Early intervention saves money on costly repairs and prevents water damage to your home. Contact an expert to restore your appliance to full functionality today.
Common Obstructions and External Connections
The Role of the Food Waste Disposer
Many households link their dishwasher drainage directly to the kitchen sink’s garbage disposal unit. When this setup is present, the disposal acts as a shared exit point for wastewater. A common oversight occurs when homeowners forget to remove the internal drain plug during installation or replacement of the disposal. This plastic plug blocks water flow entirely, causing immediate backup. Furthermore, users should verify that the disposal itself is not clogged with large food debris. Activating the disposal before starting a wash cycle can help clear the pathway. Ignoring this step often leads to persistent standing water inside the machine. Professional technicians frequently encounter this simple yet costly error during service calls.
Checking the Disposer Air Gap and Plug
Verifying the presence and removal of the disposal’s knock-out plug is the first diagnostic step. If the plug remains in place, water has nowhere to go. This internal barrier prevents any drainage from the dishwasher tub. Ensuring this component is absent allows gravity and pump pressure to move wastewater effectively. Skipping this check wastes time and may lead to unnecessary part replacements.
Inspecting the Air Gap Unit
The air gap is a small, chrome-finished device mounted on the countertop near the faucet. Its primary function is to prevent contaminated sink water from siphoning back into the clean dishwasher. Over time, this chamber collects food particles, rice grains, and grease. A clogged air gap creates a physical barrier to drainage. When the machine attempts to pump water out, it meets this obstruction. Water may spill onto the countertop from the air gap top instead of exiting through the drain line. This visible backup is a clear sign of internal blockage within the air gap cylinder.
Cleaning Debris from the Air Gap Cap
Removing the cap of the air gap reveals the accumulation of debris. A flexible wire or a straightened paper clip can dislodge stuck particles from the narrow passage. Manual cleaning with warm soapy water often restores proper flow. However, persistent blockages deeper in the connecting hoses may require disassembly. If cleaning the cap does not resolve the issue, the internal tubes may be severely restricted. In such cases, professional inspection ensures the entire ventilation path is clear. DIY attempts often fail to reach deep clogs hidden within the wall plumbing.
Examining the Drain Hose and High Loop
The corrugated hose connecting the dishwasher to the sink or disposal is another critical failure point. These hoses are prone to collapsing, kinking, or developing internal tears. A folded hose restricts water volume, mimicking a pump failure. Additionally, the installation must include a high loop to prevent backflow. Without this loop, sink water can easily reverse into the dishwasher when the disposal runs. This siphoning effect introduces stale water and debris back into the tub. Proper elevation of the hose at the highest point under the counter is essential. Improper height eliminates the siphon break, leading to recurring drainage issues.
Identifying Kinks, Clogs, and Improper Loop Heights
Inspection of the hose reveals physical damage or unnatural bends. Small objects like bones or plastic fragments can lodge inside, causing intermittent clogs. A high loop that hangs too low fails to prevent backflow. Correct installation requires securing the hose to the underside of the countertop. If the loop is missing or sagging, wastewater flows backward. Correcting this configuration requires accessing the cabinet under the sink. Misaligned hoses complicate future repairs and waste energy. Professional installers ensure the loop meets local code requirements to maintain efficient drainage performance.
Internal Components and Filter Maintenance
The drainage system relies on precise internal mechanics. When water lingers at the bottom of the tub, the issue often stems from blocked filters or failing pumps. These critical parts work tirelessly to remove waste, and neglecting them leads to persistent clogs and unpleasant odors in your kitchen.
Cleaning the Internal Filter System
Dishwashers utilize a multi-stage filtration setup to catch food particles. Without regular attention, grease and debris accumulate, restricting water flow.
Removing and Washing the Coarse and Fine Filters
Most modern units feature a cylindrical filter assembly located at the tub floor. Users typically twist and lift this unit to access both the coarse mesh and the finer screen beneath. Rinsing these parts under warm water helps remove sticky grease. However, stubborn stains often require a soft brush and mild detergent. Incorrect reinstallation can cause leaks or poor cleaning performance, which mimics drainage failure. Many homeowners struggle with the specific locking mechanism found in newer European-style models.
Addressing Chopper Mechanisms in High-End Models
Premium appliances often replace the standard filter with a chopper blade system. This mechanism grinds food waste into tiny particles to prevent clogs in the drain line. Over time, metal fragments or hard plastic pieces can jam these blades. A grinding noise during the cycle usually signals a malfunction in this area. Disassembling these complex units requires specialized tools and knowledge. Incorrect handling may damage the sharp blades or disrupt the motor alignment, leading to costly repairs.
Troubleshooting the Drain Pump and Impeller
The pump is the heart of the evacuation process. It generates the pressure needed to push wastewater out through the hose.
Diagnosing Drain Pump Failure and Motor Issues
If the machine fills with water but makes no sound during the drain cycle, the motor may have failed. Electrical components like the start capacitor can degrade over time, preventing the motor from gaining sufficient torque. A humming noise without water movement suggests the motor is receiving power but cannot turn. This is a common issue in older units subjected to heavy use. Professional testing with a multimeter is essential to confirm electrical integrity before replacing any parts.
Signs of a Blocked Impeller or Failed Capacitor
The impeller is the rotating component inside the pump housing. Small objects, such as glass shards or bone fragments, often bypass the filters and jam this blade. A blocked impeller creates a strain on the motor, eventually burning it out. Identifying this blockage often requires removing the pump assembly from the bottom of the unit. This task involves disconnecting electrical wires and plumbing connections. Only trained technicians should attempt these repairs to avoid water damage and ensure the new components are sealed correctly.
Brand-Specific Issues: Frigidaire and Other Models
Specific design flaws in certain dishwasher brands often complicate drainage problems. Recognizing these unique mechanical quirks is essential for accurate diagnosis.
Specific Challenges with Frigidaire Dishwasher Not Draining
Frigidaire units frequently present distinct hurdles that differ from generic models. Their internal architecture often requires specialized knowledge to navigate effectively.
Sensor Malfunctions in Beko and Frigidaire Units
Water sensors in Beko and Frigidaire appliances are prone to becoming stuck due to sediment buildup. This malfunction confuses the control board, leading to incorrect drainage cycles. Tilting the unit might temporarily free the sensor, but this is only a temporary fix. Professional cleaning of these sensitive components is usually required to restore proper function.
Leveling and Installation Errors Affecting Performance
Improper installation is a frequent culprit behind persistent drainage issues. Even minor misalignments can disrupt the entire water evacuation process.
Impact of Incorrect Leveling on Drain Efficiency
If a dishwasher is not level, water may not accumulate in the correct position for the pump to remove it. This misalignment prevents the drainage system from functioning as designed. Correct leveling ensures that gravity and mechanical pumps work together efficiently. Professional technicians use precise tools to adjust the feet, ensuring optimal performance and preventing future leaks or mechanical strain.
Chemical and Usage Factors Impacting Drainage
The Effects of Excessive Foam and Wrong Detergents
Using hand soap or standard laundry detergent in a dishwasher is a common mistake that leads to disastrous results. These products generate excessive suds that fill the tub, preventing water from reaching the drain pump. The foam acts as a physical barrier, blocking sensors and creating a false indication of a clogged system. Homeowners frequently mistake this over-sudsing for a serious mechanical failure, such as a broken motor or a completely blocked impeller. The accumulation of thick foam can cause the machine to shut down prematurely or repeat cycles without draining. This issue is particularly prevalent when users exceed the recommended dosage of pods or powders. Hard water conditions can exacerbate this problem, requiring specialized low-suds formulas. Ignoring detergent guidelines leads to residue buildup inside the pump housing, which eventually causes wear and permanent damage.
Avoiding Over-Sudsing and Chemical Damage
Preventing foam-related drainage issues starts with strict adherence to manufacturer recommendations. Always use detergents explicitly labeled for automatic dishwashers. Avoid using generic cleaning agents or excessive amounts of soap. If foam appears during a cycle, the machine must be paused immediately to allow the suds to settle. Continuing the cycle with high foam levels strains the motor and can lead to electrical shorts. Regular maintenance of the filter system helps manage residue, but it cannot fix problems caused by wrong chemicals. If foam persists despite using correct products, internal components may already be compromised. In such cases, professional inspection is necessary to determine if the pump or control board has been damaged by chemical exposure. DIY fixes rarely resolve underlying chemical damage effectively.
Safety Precautions and When to Call a Pro
Chemical safety is paramount when dealing with drainage issues. Never pour drain cleaners into a dishwasher. These harsh substances degrade rubber seals, plastic tubs, and metal components, leading to leaks and costly repairs. The interior of a dishwasher is not designed for corrosive chemicals, and using them voids warranties and creates hazardous conditions.
Risks of Using Drain Cleaners and When to Seek Dishwasher Repair
Attempting to clear clogs with commercial drain openers can melt internal parts and create toxic fumes. If foam or debris persists after proper detergent use and filter cleaning, professional assistance is required. Technicians have the tools to safely remove blockages without damaging sensitive electronics. Contacting an expert ensures that the issue is resolved without risking further damage to your appliance.
You might also be interested in…